(Image source from: Canva.com)
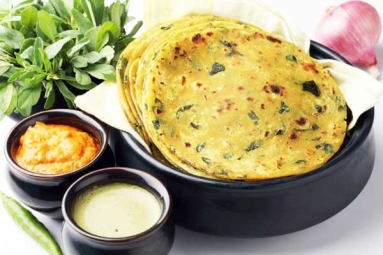
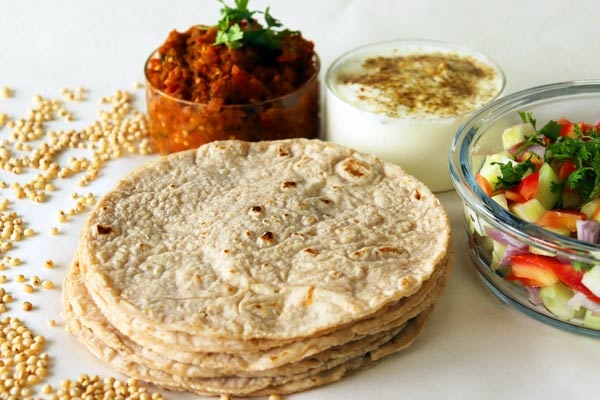
Let's be honest. Learning to cook without gluten can be both fun and annoying. You've mastered baking and are great at pancakes, but when you try to make a simple roti, it fails badly. The dough falls apart, the edges break into pieces, and your idea of a soft, warm flatbread becomes a thin, brittle crisp. But what if there was a way to make gluten-free rotis that are soft, bendable, and don't break? The kind you can fold and use to eat with your dal? It’s a simple trick using one important thing. First, let's talk about the best flours to use.
Fortunately, there are many gluten-free flours perfect for making rotis. Actually, many of these are already often used in Indian cooking. You could buy gluten-free rotis online, but it’s also good to have these flours at home.
Jowar (Sorghum) Flour: This light, bendable flour tastes mild and a little sweet. It’s a favorite for making rotis in Western and Southern India.
Bajra (Pearl Millet) Flour: This flour has a strong, nutty flavor and a darker color. Bajra rotis are a common winter food in India, enjoyed for their warmth and health benefits.
Ragi (Finger Millet) Flour: With a deep, natural taste and reddish-brown color, ragi is full of calcium and fiber. It&039;s a good way to make your rotis more nutritious.
Rice Flour: A plain, white flour made from ground rice. It can be hard to use by itself, but it mixes well with other flours to make a softer roti.
Chickpea Flour (Besan): A common ingredient in Indian food, besan has a nutty taste and is great for making chilla or pudla (savory pancakes). You can also add a little to your roti dough for more flavor.
How To Make Perfect Gluten-Free Rotis?
Add Psyllium husk: Psyllium husk, which is also known as isabgol, is the key thing you’re missing. When mixed with water, it makes a thick, jelly-like stuff that gives your dough the stretch and stickiness it really needs. Without this, flours without gluten such as jowar, bajra, and ragi won’t have firmness. If you add one tablespoon of psyllium husk for each cup of flour, you can turn that crumbly mix into a nice, easy-to-work-with dough.
Knead the dough correctly: Now we will talk about the way to do it. Always be sure to use very hot water. Flours without gluten, not like wheat flour, don't just absorb water; they must be partly cooked to get softer. Start by mixing your chosen gluten-free flour (or two types mixed together) with the psyllium husk and some salt. Then, pour in boiling or very hot water, mixing with a spoon to keep your fingers safe from the heat. After the mixture cools enough to touch, knead the dough for a few minutes. You’ll see the dough change from a sticky, loose mixture into a smooth ball that stretches a little. It's done when you push it with your finger and it stays in that shape.
Roll the rotis gently: Be careful when you're rolling them out. Put a little dry flour on your rolling board and on the ball of dough. Use slow, even pressure while turning the roti after you roll it a couple of times. Don’t press too hard or roll too fast, because that’s how cracks can happen. The psyllium husk helps it stretch a bit, but a light touch is still key. One good idea is to put a big bowl or plate with a flat bottom on the roti to make it a perfect circle.
Cook at the right temperature: The last thing is how to cook it. Heat up your tava or griddle until it’s hot to the touch. Put the roti on the pan, let it cook for about half a minute, then turn it to the other side. Cook the other side for another half a minute to forty-five seconds, until you see little bubbles show up. To make it puff up, you can either put it over a flame or keep cooking it on the tava while carefully pressing the edges with a cloth.
Your first try might not be perfect, but with some practice, you’ll be able to make soft, good-looking rotis that taste as good as they look. And if you don’t have much time or patience, you can always order rotis and other meals without gluten like cakes through a food delivery app.